
Get a FREE digital
copy of Renovate Handbook!
Just sign up to our newsletter and we'll send it your way.
Get Renovate Handbook


Adding a second storey to their existing home proved a family-friendly alternative to buying a bigger home.
Adding a second storey to their existing home proved a family friendly alternative to buying a bigger home in an overheated property market.
When Lindsay and Murray Kernohan started looking for a new home in 2012, it didn’t take them long to realise that staying put and going up was the only option.
As parents of two active boys Tom (5) and Luke (2), the Kernohans found themselves outgrowing their home they had shared for the past decade. But their search for a new place to live proved fruitless. “We couldn’t find anything suitable in the areas we wanted to live in,” says Lindsay. “So we started thinking about how we could extend the home we already had.”
The idea of adding an extra storey to their existing 1920s bungalow had crossed the couple’s minds. “But we thought there would be issues with consent, and it just seemed too hard,” Lindsay shares.
Enter Refresh Renovations, Lindsay and Murray contacted the company in 2012 to investigate the possibility of lifting the house up a level. They were quickly reassured that this would indeed be possible, and were soon shown a design plan to help facilitate the project.
The Kernohan’s current home had three bedrooms and two smallish bathrooms, which was proving a bit tight for the four of them. The new plan would see this space transformed into living, dining, and cooking areas, with one guest bedroom and en-suite. The top floor would house three new bedrooms, all spacious, a bathroom for the boys, and an en-suite off the master bedroom. It was a big job, but significantly cheaper than relocating.
“I also wanted a large landing,” says Lindsay. “I love having a sense of space in a home.”

Murray bought the home in the 1990s. It had been moved to the site from another location. This meant the groundwork was already in place, which was a significant cost saver.
The structural work required for the extra level was relatively minimal as well. Two pieces of reinforcing steel where placed at key load points, but the rest of the weight is borne by structural Gib board on the lower level.
“It didn’t seem like much to hold up an extra floor, but it’s worked perfectly,” says Lindsay. “And it’s been very cost effective.”
Renovation work began in May. As a stay-at-home mum with two boys under 5 (Tom has only recently started school), living in what was essentially a construction site was always going to be a challenge. But Linsday is philosophical about the experience.
“We knew that it was going to be short-term, and that there would be a huge long-term gain. And the builders have been incredibly considerate.”
At the beginning, the tradespeople used exterior ladders to access the upper level. “It was very noisy, but it wasn’t too bad,” says Lindsay. “It was harder when they had to work inside. But, as I said, we knew it was just a short-term thing.”
While the Kernohans were excited about the prospect of more space, they were also committed to maintaining the historic integrity of the home. The original 1920s bungalow had the handsome bay windows typical of the style, and these have been incorporated into the upper levels of the house as well.
Weatherboard cladding on the upper level has been painted to match. “I know there weren’t two storey bungalows in the 1920s, but it really looks like the whole house is original,” Lindsay shares.

The interior design, too, was important. As mentioned earlier, Lindsay loves homes to have a sense of space. To help facilitate this, they chose light colours for the walls in the shared upstairs areas.
They also chose to paint the doors upstairs white, and will continue this look downstairs in the future. While the downstairs has polished wooden floors, the Kernohans have chosen to use a durable, neutral carpet on the second floor.
While the shared living spaces upstairs are pale and airy, Lindsay says her boys were committed to having colour in their rooms.
Eldest son Tom has a green room, and little Luke room’s is painted in shades of blue. “There’s a navy feature wall and then a lighter blue on the other walls.”
The use of colour is continued in the master bedroom, but to a lesser extent. “We have a feature wall with colourful wallpaper,” says Lindsay.

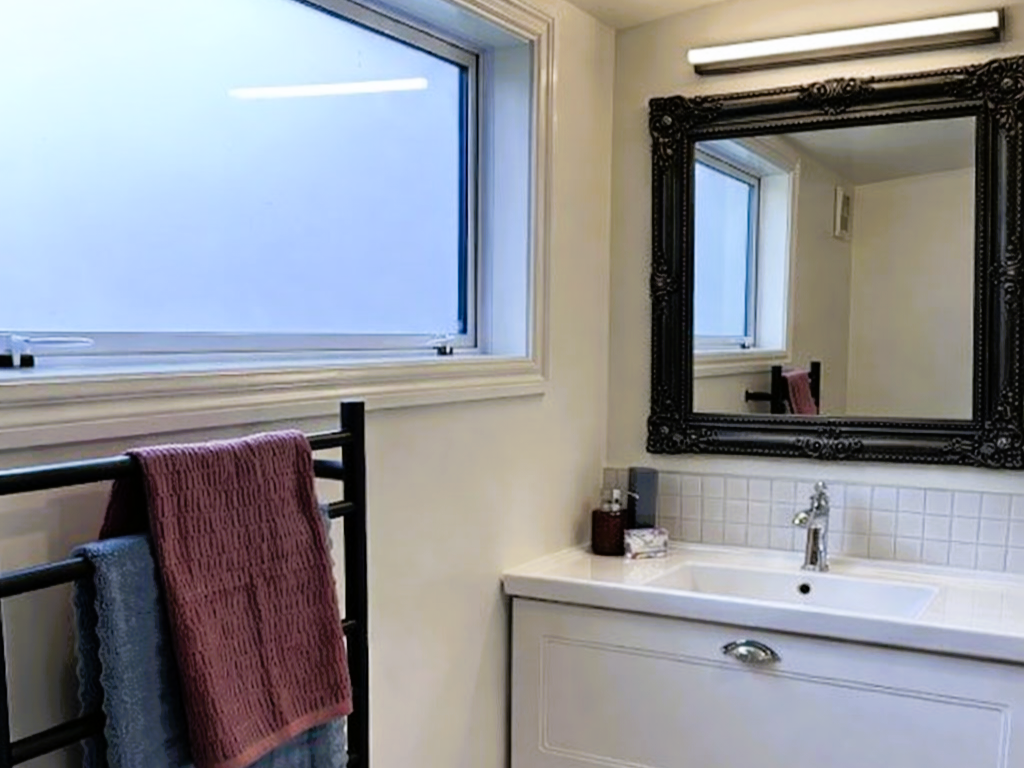
The two upstairs bathrooms were very important to the family. The downstairs bathroom has a clawfoot bath, which while beautiful, wasn’t very practical for two small boys. The boys’ new bathroom is all about practicality. It has an extra bath and shower, and is tiled with mottled, natural-stone coloured tiles, to help hide drip marks.
It’s a different story in the en-suite, where luxe is the order of the day. The room is intersected by a huge curve of glass, which delineates the shower space and accentuates light and space that Lindsay loves so well. The shower head is able to be turned into a rain head, and the whole area acts almost like a “wet room”.
Storage space is all important when you’ve got kids, and the updated bungalow has it in spades. Lindsay’s treasured landing has plenty of new cupboards, and there is storage space under the staircase which goes through Luke’s old room. “The room is now an office,” says Lindsay.
Also downstairs is a spacious living room, which incorporates what used to be Tom’s bedroom. It’s long enough to have two designated zones; a play area for the boys at one end, and an area for the grown-ups which will hold a large dining table. There is also an extra living room, where the fire and the television are located.
While Lindsay and Murray were initially concerned about how their small boys would cope with having strangers trouping through the house, their fears proved unwarranted. “They found it all really interesting,” says Lindsay. “They loved chatting to the builders and watching the work being done.”
In fact, Tom loved the process so much he’s decided he wants to be a builder when he grows up. “But that will probably change by next week,” laughs his mum.

Q & A with a Refresh Renovations Renovation Consultant
Here are his tips on what to look out for when planning a renovation and on how to save money on a house extension.
What was the vision that Lindsay brought to you for this renovation project?
They came to us mainly wanting more space for their growing family. Lindsay’s parents live overseas but love spending lots of time with their grandsons when they visit, so Lindsay and Murray thought it would be really nice to give them their own room and en-suite when they are here. They knew that they had a decent amount of space in the roof area so this became the obvious choice to utilise.
What was the original style and build of the house that you had to work with?
The original home is a 1920s – 1930s bungalow that was actually moved onto its current site a couple of decades back. Murray had also undertaken an extension to the back of the home a few years back, which was very sympathetic to the original home. This meant that we were working with some decent foundations and a decent starting platform to work with, which was great as it is often an issue when adding second story additions on a home of this era.

Were there any issues due to the way the house already was? And were there any other obstacles that popped up while completing the renovation?
No major issues with the existing home, there was a little bit of dodgy weatherboarding done by other past builders on the extension which we had to remove and rectify, but this didn’t pose too many issues. The remainder of the home was mostly in really good condition which was great as often we will find Bora or dry rot in this style of home.
One big issue that is always faced when adding a second storey is weather proofing during the build as one of the first tasks is to remove the roof! With today’s health and safety requirements we had to have a full site scaffold and roof fall protection so it made sense to also add a scaffold roof over the top of the entire structure with enough room to fit the new addition into.
This was then fully wrapped in plastic ‘shrink wrap’ to keep the whole project water tight during the build. The builders love it as its warm during winter, dry all day and keeps the sun off them in the summer months. It also meant that we could paint the new addition and get it fully water tight before the wrap came off. It’s like having a huge stadium over the whole house and keeps the neighbours wondering what’s going on…

In regards to the building consent process, were there any issues trying to get this through?
No major issues. The extension was built in the allowable envelop so there was no resource consent triggered for this or anything else. The building consent was actually issued very quickly which is great testament to the designer and his attention to the councils required details.
It does run very close to the southern height in relation to boundary, but we had this checked and confirmed at framing stage to make sure we were clear.
Did Lindsay want to create the double extension in the same style – or was the whole house renovated for a new look?
Keeping the same style with the extension and existing home was one of the most important factors about this project. It was very important to Murray and Lindsay that the second story didn’t look like a ‘pop top’ addition.
I’m very proud to say that we have had many comments from neighbours in the street and even people who drive past every day and the resounding remarks are about how the second storey seamlessly blends with the original home and looks like it has always been there.
We partly managed to achieve this by matching the cedar shingle bellcasting on the front gable and matched an existing bay window, which also has cedar shingles around the base. This all added up to keeping the existing character alive and really ties the second story in with existing ground floor.
It was also decided to use double glazed timber joinery to match the existing joinery and keep the warmth in and noise out. This doesn’t come cheap, but is well worth the investment as I’m sure Murray and Lindsay would also agree!
You have mentioned that this double extension was created in a unique way to ensure that costs were kept down. Are you able to explain how this was achieved?
My brief to Buildology was to use as little steel in the build as possible. Basically if more steel is involved, this means more point loading piles and more disruption to the existing ground floor, which all adds up to extra costs.
Between them and the engineer they managed to keep the steel beams down to only two, which were required to span a corner of the second storey over the existing master bedroom meaning this was the only room that required any level of major disruption.
The remaining floor is all spanned with standard timber joists, which was much easier to construct and also meant great savings for the owners. Another very clever idea came from Buildology with regards to the bracing requirements in the existing ground floor. When a second storey is placed on top of any existing house, that existing house has generally never been designed or built to carry the weight of a second storey.
This means that a substantial amount of extra bracings is required in the ground floor walls to support this and is generally in the form of Gib bracing. Buildology specked mostly ’GS1 braces’, which meant that we could just screw the existing Gib Board linings at the required centers to comply with council requirements. This saved a huge amount of disruption and cost to the owners and also sped up the overall build time.
What were the highlights of the renovation?
The removal of the scaffolding and shrink-wrap was a highlight for me; it was almost a ‘move that bus moment’ as the whole street was very interested to see what we had been doing under the ‘tent’ for four months! The front bay window is also a stand out for me as this took a lot of skill and design to achieve the perfect look. I’m also really happy with the way the overall project has come together.
What is the best advice you would give to a client who wants a renovation – in regards to making the process easier for them?
Planning and decision making, it’s absolutely critical to the success of the project. I always try and get my clients to select tiles, plumbing fittings, colours and finalise spatial layout et cetera before the build even starts. This way there is no rushed decisions or changes during the build as this all adds to the owners’ and builders’ stress levels during an already stressful time!
I always like to remind the clients that any changes they make during the build will generally cost them money, so careful planning is critical.
See More Auckland Renovation Projects
See Our Testimonials

This article by Joanna Mathers featured on page 60 of Issue 009 of Renovate Magazine. Renovate Magazine is an easy to use resource providing fresh inspiration and motivation at every turn of the page.
Get in touch with Refresh to discuss your home renovation project
If you would like to discuss home renovation options for your next renovation project, please use the enquiry form on this page to provide us with your contact details. We will get in touch with you at a time that suits you to discuss your project. If you would like to provide us with more information about your project, we have a more comprehensive enquiry form on our "Get in touch" page too.
*All information is believed to be true at time of publishing and is subject to change.

Actual costs vary by project. Plan ahead to reduce the impact of industry changes or disruptions. For more information see here.

Related Projects


Talk to a renovation consultant today
If you would like to find out how Refresh Renovations can support you with a high quality, efficient home renovation, get in touch today. Your local Refresh consultant will be happy to meet with you for a free, no obligations consultation.